Authentik - OpenCloud integration
Table of Contents
I’ll get straight to the point here ladies and gents. The contains of this post is to show you how to integrate OpenCloud’s OIDC with Authentik.
There is some good documentation in Authentik’s website that explains how to set up both sides of the equation. There are a couple of quirks with OpenCloud’s implementation of OIDC.
- The first one is that each type of OpenCloud client needs its own OIDC client as well (or for the case of Authentik that would be a provider).
- The client IDs are for some reason hard coded for each OpenCloud client, so you’d need to match those on Authentik’s end
That could be ok if you are using a different SSO service other than Authentik, but for our case we are running in a design limitation of Authentik’s side because it allows a single provider per application. I you want to use just one OpenCloud client then that would be ok, but I find it unlikely. The above linked documentation from Authentik’s webpage shows two guides, one for a single client and another if you want to utilize all 4 available OpenCloud clients (web, desktop, android, iOS). For both cases following the documentation should work.
But then you’d be hitting another caveat in OpenCloud’s OIDC. You’ll notice that all your users can log in to OpenCloud but they are all default user types, so basically a user. That leaves you without an admin user to be able to set quotas, manage spaces or the other users themselves somehow.
Using authentik’s groups
First you’d need to create 4 new groups
- opencloud-admin
- opencloud-spaceadmin
- opencloud-user
- opencloud-guest
Add users to their respective groups
Bind the groups to all 4 of the applications in Authentik
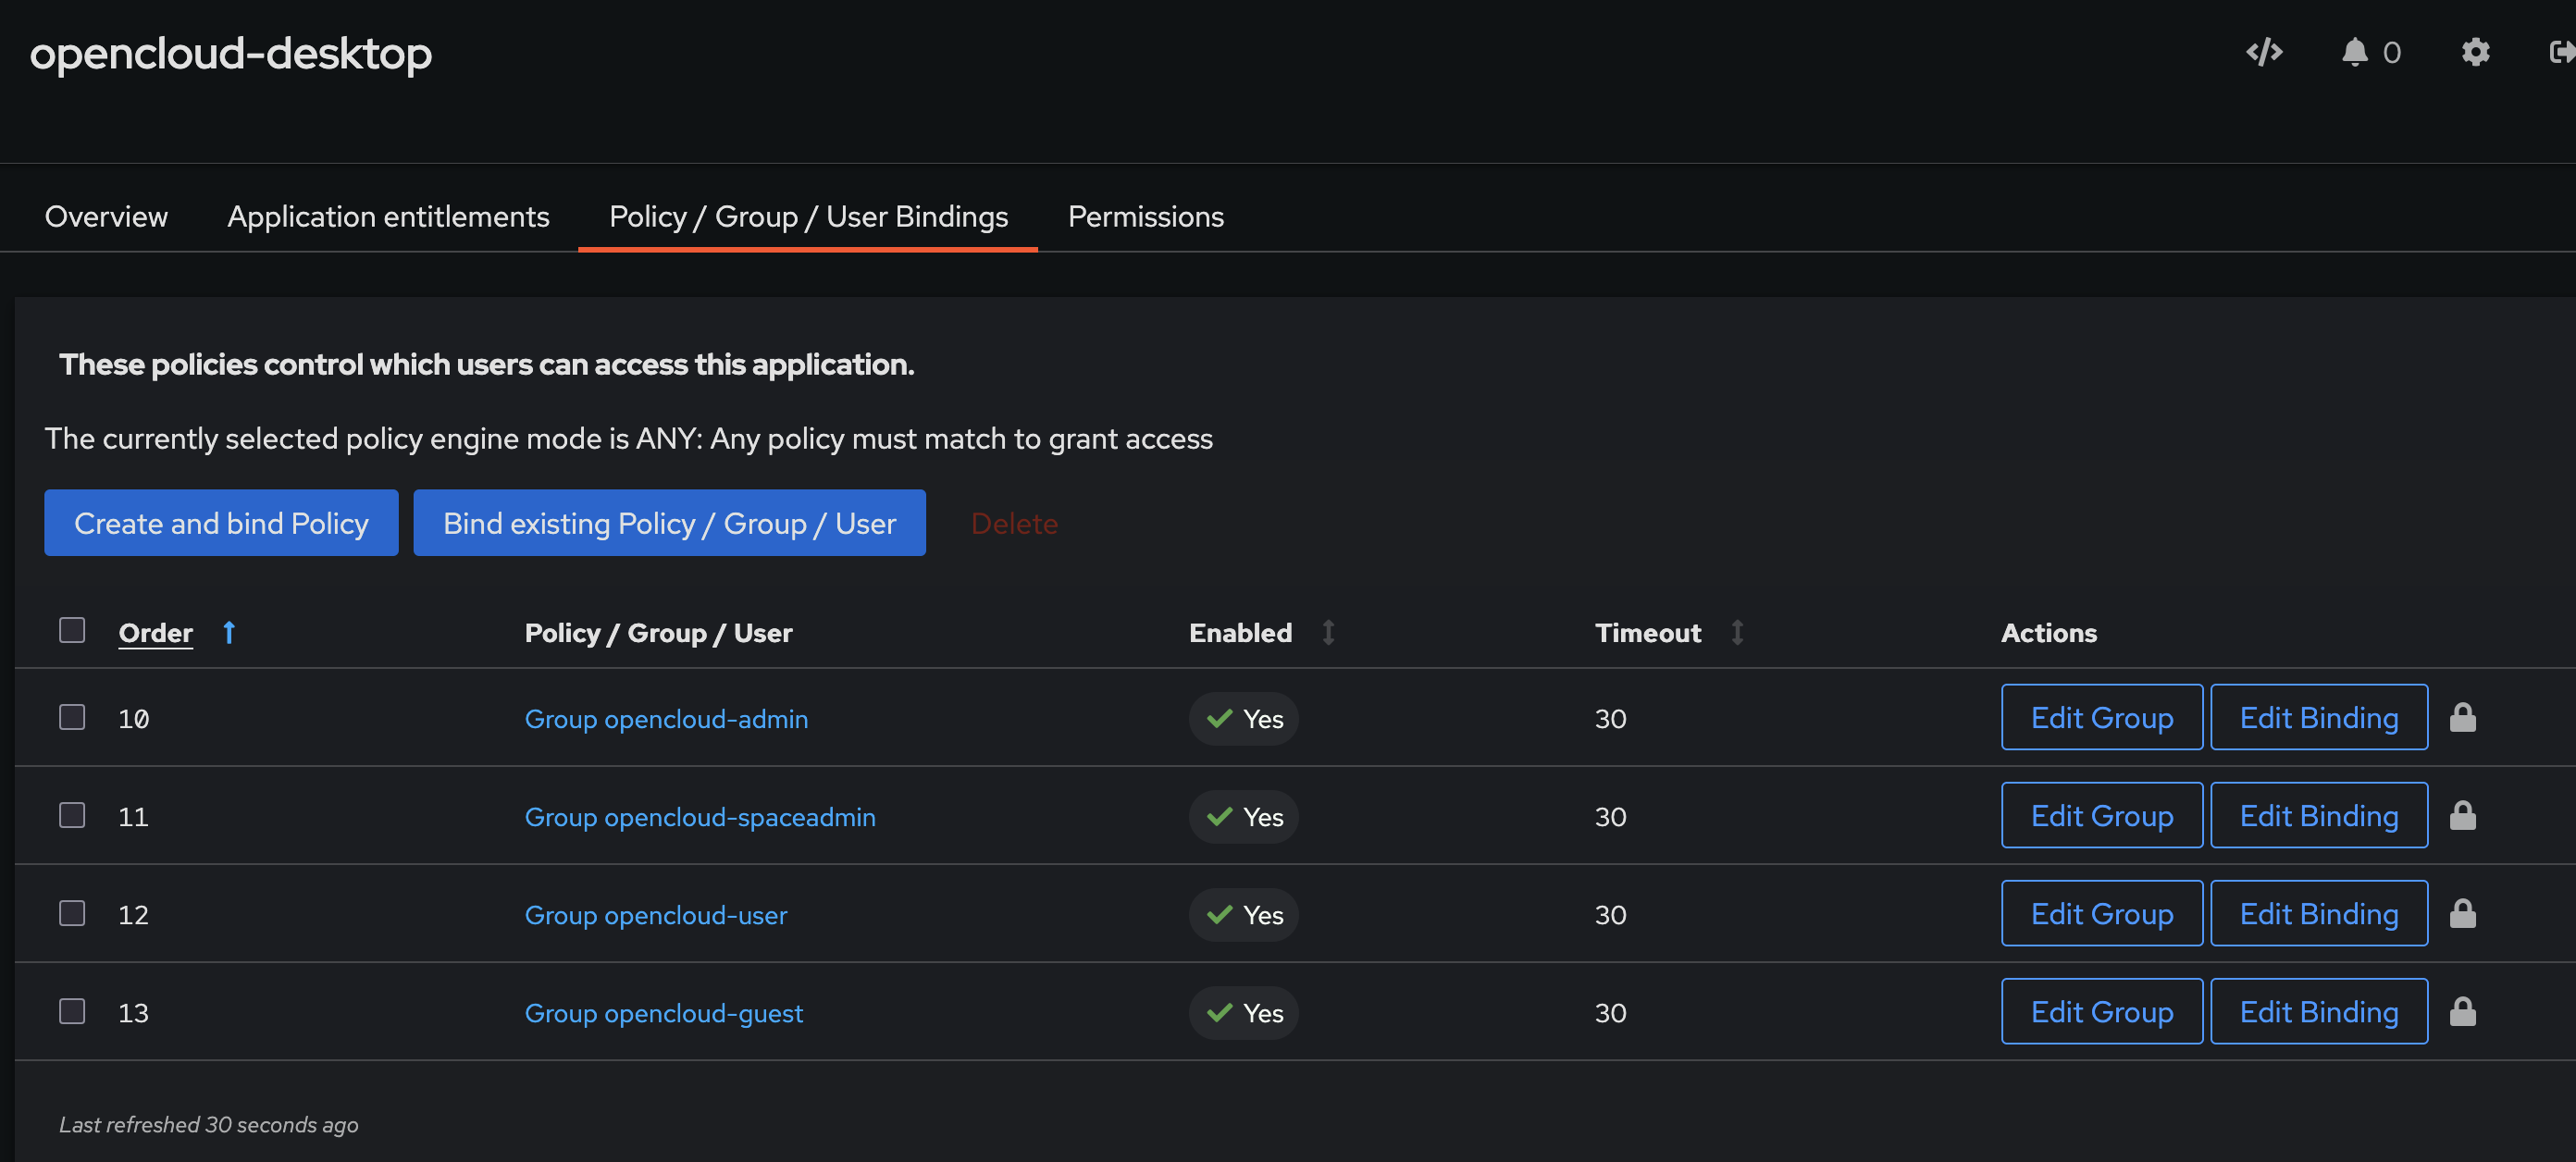
Edit the following .yml files in OpenCloud’s config In custom/authentik-roles.yml which you should have created following Authentik’s guide:
services:
opencloud:
    environment:
        PROXY_OIDC_ACCESS_TOKEN_VERIFY_METHOD: "none"
        GRAPH_ASSIGN_DEFAULT_USER_ROLE: "false"
        GRAPH_USERNAME_MATCH: "none"
        PROXY_OIDC_REWRITE_WELLKNOWN: "true"
        PROXY_ROLE_ASSIGNMENT_OIDC_CLAIM: "groups"
        PROXY_ROLE_ASSIGNMENT_DRIVER: "oidc"
in your .env file:
IDP_DOMAIN=auth.domain
IDP_ISSUER_URL=https://auth.domain/
IDP_ACCOUNT_URL=
OC_OIDC_CLIENT_ID=web
OC_OIDC_CLIENT_SCOPES=openid profile email groups
WEBFINGER_WEB_OIDC_CLIENT_ID=web
WEBFINGER_WEB_OIDC_CLIENT_SCOPES=openid profile email groups
WEBFINGER_DESKTOP_OIDC_CLIENT_ID=OpenCloudDesktop
WEBFINGER_DESKTOP_OIDC_CLIENT_SCOPES=openid profile email groups offline_access
WEBFINGER_IOS_OIDC_CLIENT_ID=OpenCloudIOS
WEBFINGER_IOS_OIDC_CLIENT_SCOPES=openid profile email groups offline_access
WEBFINGER_ANDROID_OIDC_CLIENT_ID=OpenCloudAndroid
WEBFINGER_ANDROID_OIDC_CLIENT_SCOPES=openid profile email groups offline_access
COMPOSE_IDM=idm/external-idp.yml:custom/authentik-roles.yml
and in OpenCloud’s RUNTIME config directory you should look for opencloud/proxy.yaml and add the following block:
role_assignment:
    driver: oidc
    oidc_role_mapper:
        role_claim: groups
        role_mapping:
            - role_name: admin # Opencloud group
              claim_value: opencloud-admin # Authentik group
            - role_name: spaceadmin
              claim_value: opencloud-spaceadmin
            - role_name: user
              claim_value: opencloud-user
            - role_name: guest
              claim_value: opencloud-guest
In my case I have also modified in my .env file the paths where the config and data volumes are. So that they bind with subdirectories in my compose directory and that file is located under ./config/opencloud/proxy.yaml
~/opencloud-compose$ tree -L 1
.
├── LICENSE
├── README.md
├── antivirus
├── apps
├── certs
├── config
├── custom
├── data
├── docker-compose.yml
├── external-proxy
├── idm
├── monitoring
├── radicale
├── renovate.json
├── search
├── storage
├── testing
├── traefik
└── weboffice
You can do the same by setting the values of OC_CONFIG_DIR and OC_DATA_DIR to /path/to/compose-dir/config and /path/to/compose-dir/data respectively.
And theoretically that should be all it takes as of July 2026. Also important to note is that I am running the stable release of the project and not the rolling one